Using Disko, the vsib_record GUI
Configuration
The file ~/.disko_config contains local configuration information such as antenna name, data disk locations and default parameters for vsib_record. Before using Disko for the first time please look through ~/.disko_config to check that it suits your location.
Using Disko
When logged on to the recorder PC, type:
disko
After a few seconds the GUI should appear. Check that the Antenna name at the top of the interface is correct. If not, check ~/.disko_config.
Disk information
Below the antenna and time information is a table of available data disks, their sizes and capacities (Figure 1). This table is updated every 10 seconds. The Time left column indicates how much recording time is available on each disk based on the data rate for the current configuration. Select the disk you want by clicking on the appropriate radio button on the left-hand side of the table.
 Figure 1: Available disks and their capacities |
Recorder configuration
Below the Disk section of the GUI is the section that controls data file naming, the recoding mode, start time and duration (Figure 2). In the Experiment section, type in the name of the experiment. This information is used to label the data files, so it's important to fill it in correctly. All experiments get their own subdirectory (indicated in the scrolling log) except data files for the VT02 seried of fringe-check experiments which are all put in a FringeCheck subdirectory. This helps to identify them as files that can be removed once fringe checking has been completed. Next choose the Bandwidth per channel and select the channels to be recorded next to Record mode. Note that the Bit rate will change accordingly, as will the Time left indicator in the disk section. If you want to use a non-standard mode, set Record mode to "other" and adjust the Number of bits and Compression mode as required.
 Figure 2: Recorder configuration and interaction. |
The next session allows you to chose between a scheduled or manual start of the recorder and to set the recording duration. Choose between a Scheduled start, in which case the start time and Duration must be specified, or Manual start, in which case only the recording Duration needs to be set. When setting up for a Scheduled start, pressing the [Now] button will set the start time to the current time which can then be increased a little if desired.
Once the recorder configuration has been done, vsib_record can be told to start by pressing [Start]. If for any reason you wich to stop recording early, press [Stop].
Monitoring during recording
While the recorder is running, disko monitors vsib_record output and issues a warning if it detects a problem. Disko currently checks for the following:
- Missed 1PPS
- If a 1PPS is missed, it is logged and a bell is sounded.
- Disko maintains a buffer of up to the last 20 1PPS verifications. If more than 5 of the last 20 are missed, a popup window issues a warning and there is more annoying beeping.
- BIGBUF size
- Disko will issue a warning if the size of BIGBUF gets below 80%
- A popup window and beeping if BIGBUF gets below 50% capacity. This is usually a good indication that vsib_record is about to die.
- Disk capacity.
- If the disk reaches 95% capacity, a warning message is issued and the the user is encouraged to change disks and/or delete some data.
The recorder monitoring section shows the 1PPS and Bigbuf status during recording (Figure 3).
 Figure 3: Recorder monitoring information. |
The log
The bottom section of the GUI shows a scrolling log (Figure 4). Disko will write any important information to the log which is also sent to a file in the log_dir directory as configued in ~/.disko_config. You can also add your own comments to the log by typing in the Comment section and clicking [OK] or pressing [Enter] when finished. To save typing, some commonly used comments can be inserted from the Template comments drop-down menu. The time the comment is entered is automatically prepended and placed in the log.
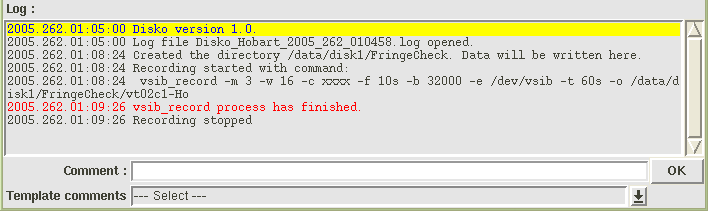 Figure 4: The scrolling log and comment input section. |
Jim Lovell